Connecting to the Robot
Important
This page assumes that you are using one of our newest generation robots, the Magni Gen 6.
For information about older robot generations or images, please refer to our Legacy Documentation.
Magni 6 robots broadcast their own Wi-Fi network by default. You can connect via this Wi-Fi or integrate the robot into your local network.
Note
When first unboxed or after flashing a fresh image, the robot will always start by broadcasting its own Wi-Fi network.
Warning
While connected to the robot’s Wi-Fi, you will not have internet access. To use both the robot and the internet, switch to the local network option.
Before continuing, ensure your workstation is set up: Setting up your Workstation.
Option 1: Connect via Robot’s Wi-Fi
Note
This section assumes you already unboxed and set up the robot.
Power on the robot.
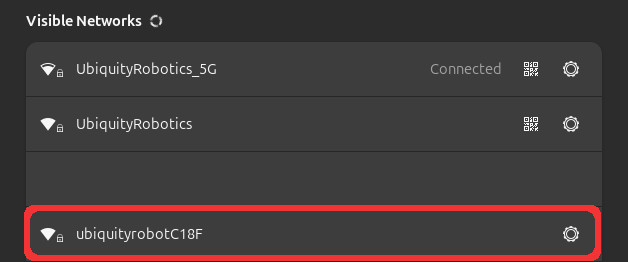
Connect your computer to the Wi-Fi network:
SSID:
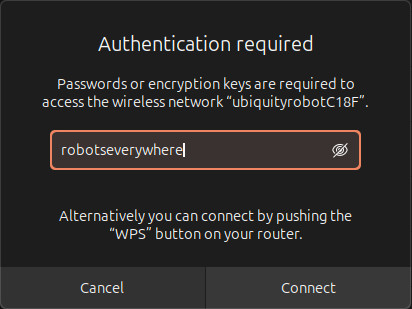
UbiquityRobotXXXXPassword:
robotseverywhere
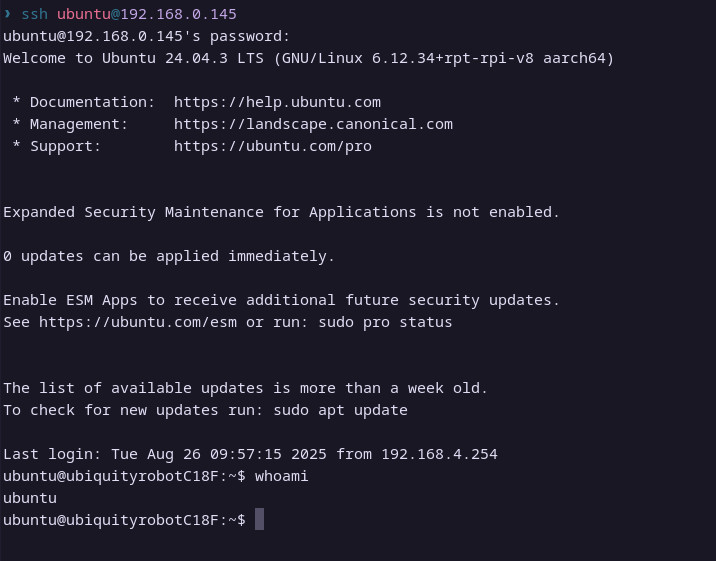
Open a terminal and SSH into the robot:
ssh ubuntu@192.168.0.1Important
The IP
192.168.0.1is static and is valid for all of the robots.Meaning that for every robot, when the robot emits its own Wi-Fi you can SSH through this IP.
Enter the SSH password when prompted: ubuntu. Note that the password will not be visible while typing.

You are now connected directly to the robot.

If you successfully connected to the robot you can now drive it through the terminal. Follow this guide: Driving the robot using Terminal to see how to do it.
Option 2: Connect via Local Network
Note
This method allows simultaneous access to the robot and the internet.
Important
Finishing this step will cause the terminal to become unresponsive. This is expected behavior, as the connection is switching from the robot’s Wi-Fi network to the local network.
You may safely close the terminal once it stops responding.
First connect to the robot via robots Wi-Fi (see Option 1).
From the SSH session, connect the robot to your Wi-Fi network:
sudo nmcli device wifi connect <Local_Netowork_name> password <password>
Example:
sudo nmcli device wifi connect mywifi password mypass1234

Tip
If the robot cannot find your local network, first list nearby Wi-Fi networks from the robot:
nmcli device wifi list
If your local Wi-Fi (SSID) does not appear in the list, restart the robot and try the connection process again.
Find the robot’s new IP address on your router (hostname:
ubiquityrobotXXXX).
You can find the robot’s IP address in two ways:
Simple way (if you have access to router credentials): Log in to your router settings and locate the robot in the list of connected devices.
Alternative: Scan your local network using
nmap.
Method 1 - Router Settings
If you know your router credentials, first determine your default gateway by running the following command in a local terminal:
ip route
You should see an output similar to:
default via 192.168.1.1
The IP address shown is your default gateway. Enter this IP into your web browser to open the router login page.
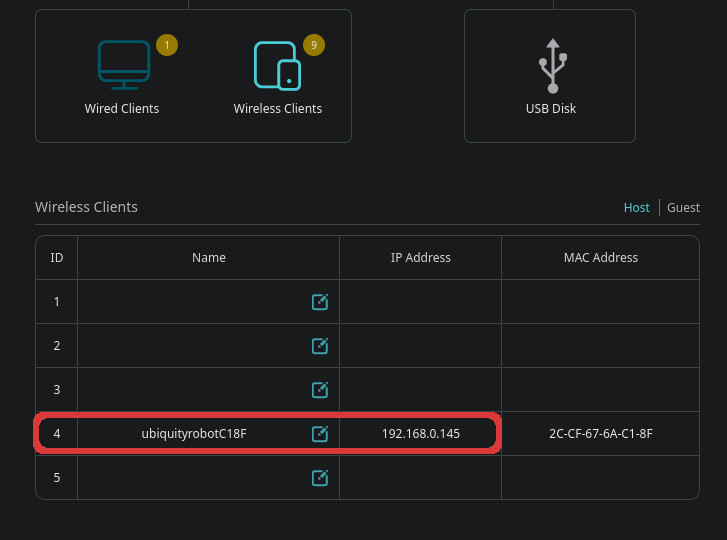
After logging in, navigate to the connected devices section and look for the robot.
It should appear as ubiquityrobotXXXX, where XXXX represents four hexadecimal characters.
For reference, our connected devices sections looks like this (your interface may differ):
Method 2 - Using
nmap
First, install nmap:
sudo apt update
sudo apt install nmap
Next, determine your device’s IP address and network interface.
ip route get 1.1.1.1
The output will include your device’s source IP address and the interface name (for example, wlp, or enp.).
Now find the network mask:
ip -brief addr
This command lists the active network interfaces on your device.
Locate the same interface identified in the previous step.
The IP address will include a suffix such as /<mask>.
Copy the full address together with the mask.
Run the following command:
nmap -sn <IP>/<MASK>
This scans your network and returns a list of connected devices along with their IP addresses.
Look for the hostname ubiquityrobotXXXXX.
Once identified, you can see this IP address to SSH into the robot.
Important
The nmap command will only detect the robot if it is on the same local network.
Ensure your computer is connected to the same network that the robot was connected to in the previous step.
SSH into the robot using the IP:
ssh ubuntu@[ROBOT_IP]
You are now connected through the local network with the internet access.
Test your connection by driving the robot: Driving the robot using Terminal.
Next Steps
Now that your robot is connected with internet access, you can start interacting with it. A good first step is driving the robot manually.
We provide two simple options:
Driving the robot through the terminal which you may have already tested if you followed the guide.
Try them out to verify your setup and begin exploring the robot’s capabilities.