Unboxing Magni 6 MIDI
This guide covers the unboxing and initial setup of the Magni 6 MIDI robot.
What’s in the Box?
When you first open your Magni 6 MIDI, please verify that you have received the following components:
Magni 6 MIDI Chassis
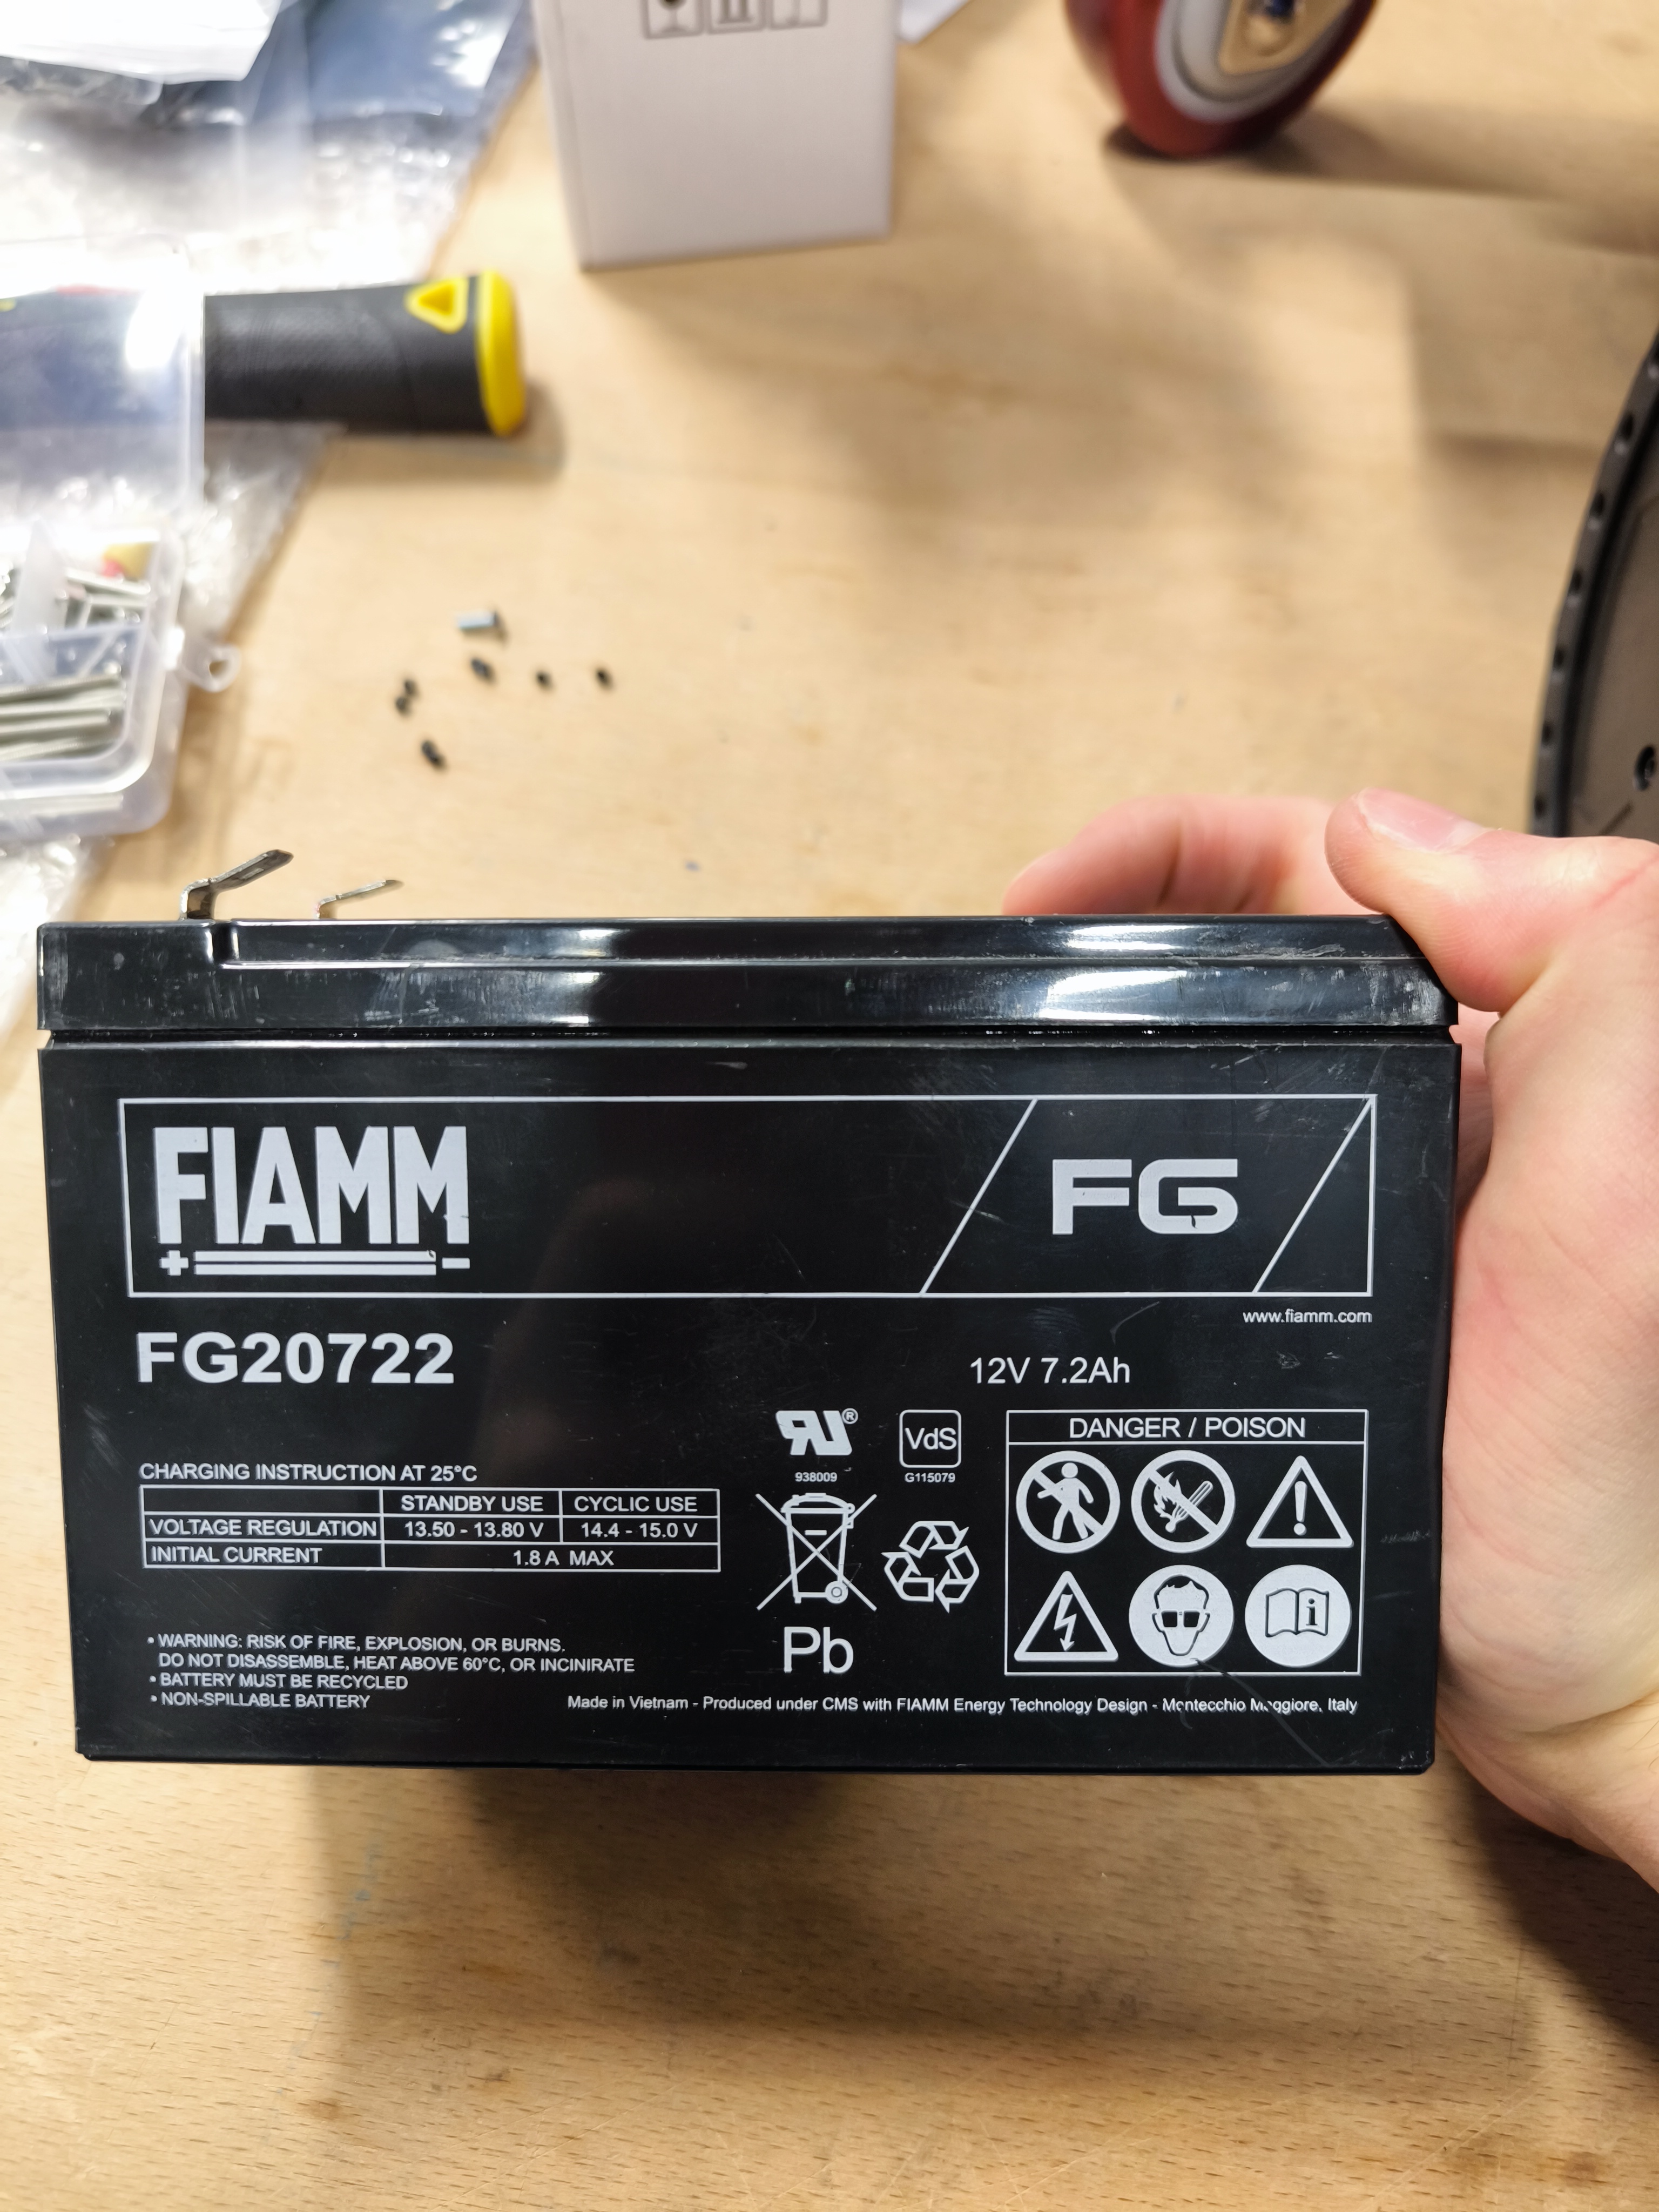
Battery Brackets: Designed for larger batteries (FG20721).
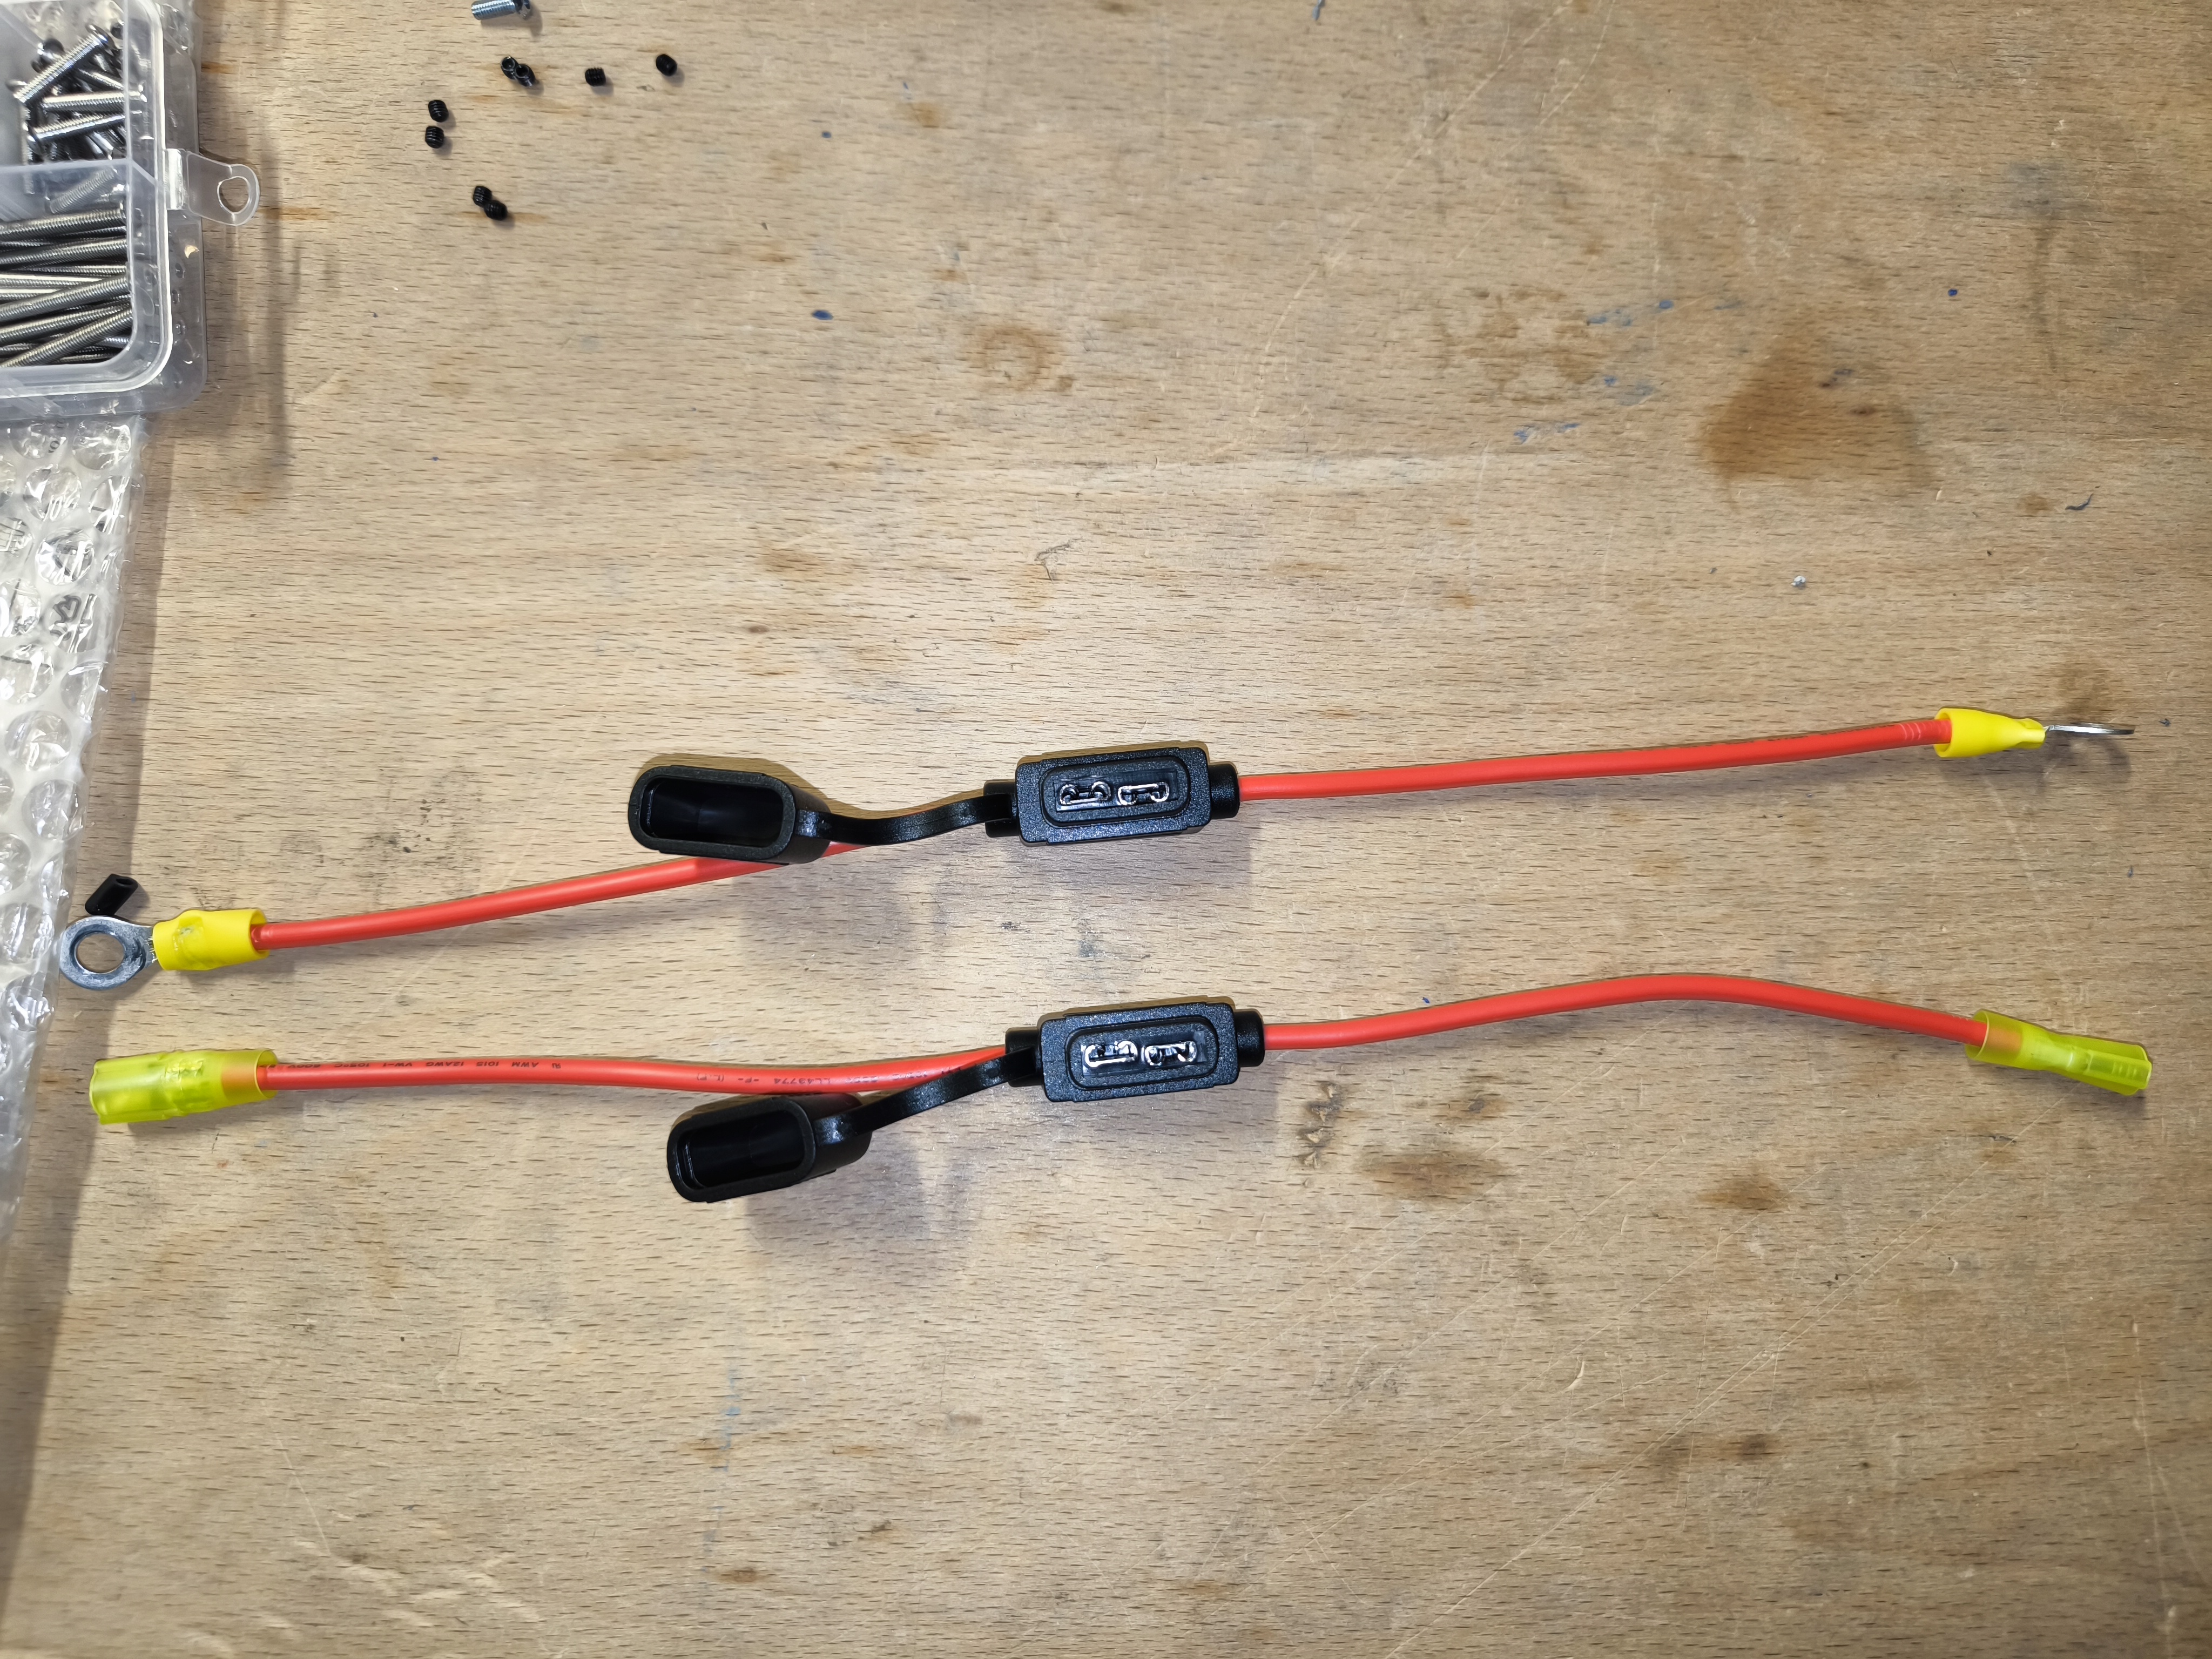
Wire Harness: Configured for standard connection.
Documentation & Quick Start Guide
Battery Installation
The Magni 6 MIDI is designed to also use high-capacity 33Ah batteries. Please ensure you are using the correct battery type.
Battery Specifications
The recommended battery for this model is the FG20721.
Note
When ordering batteries, ensure they have 6.35mm (or 6.4mm) FASTON terminals. Some batteries come with smaller 4.75mm terminals, which are not compatible with the standard Magni wire harness.
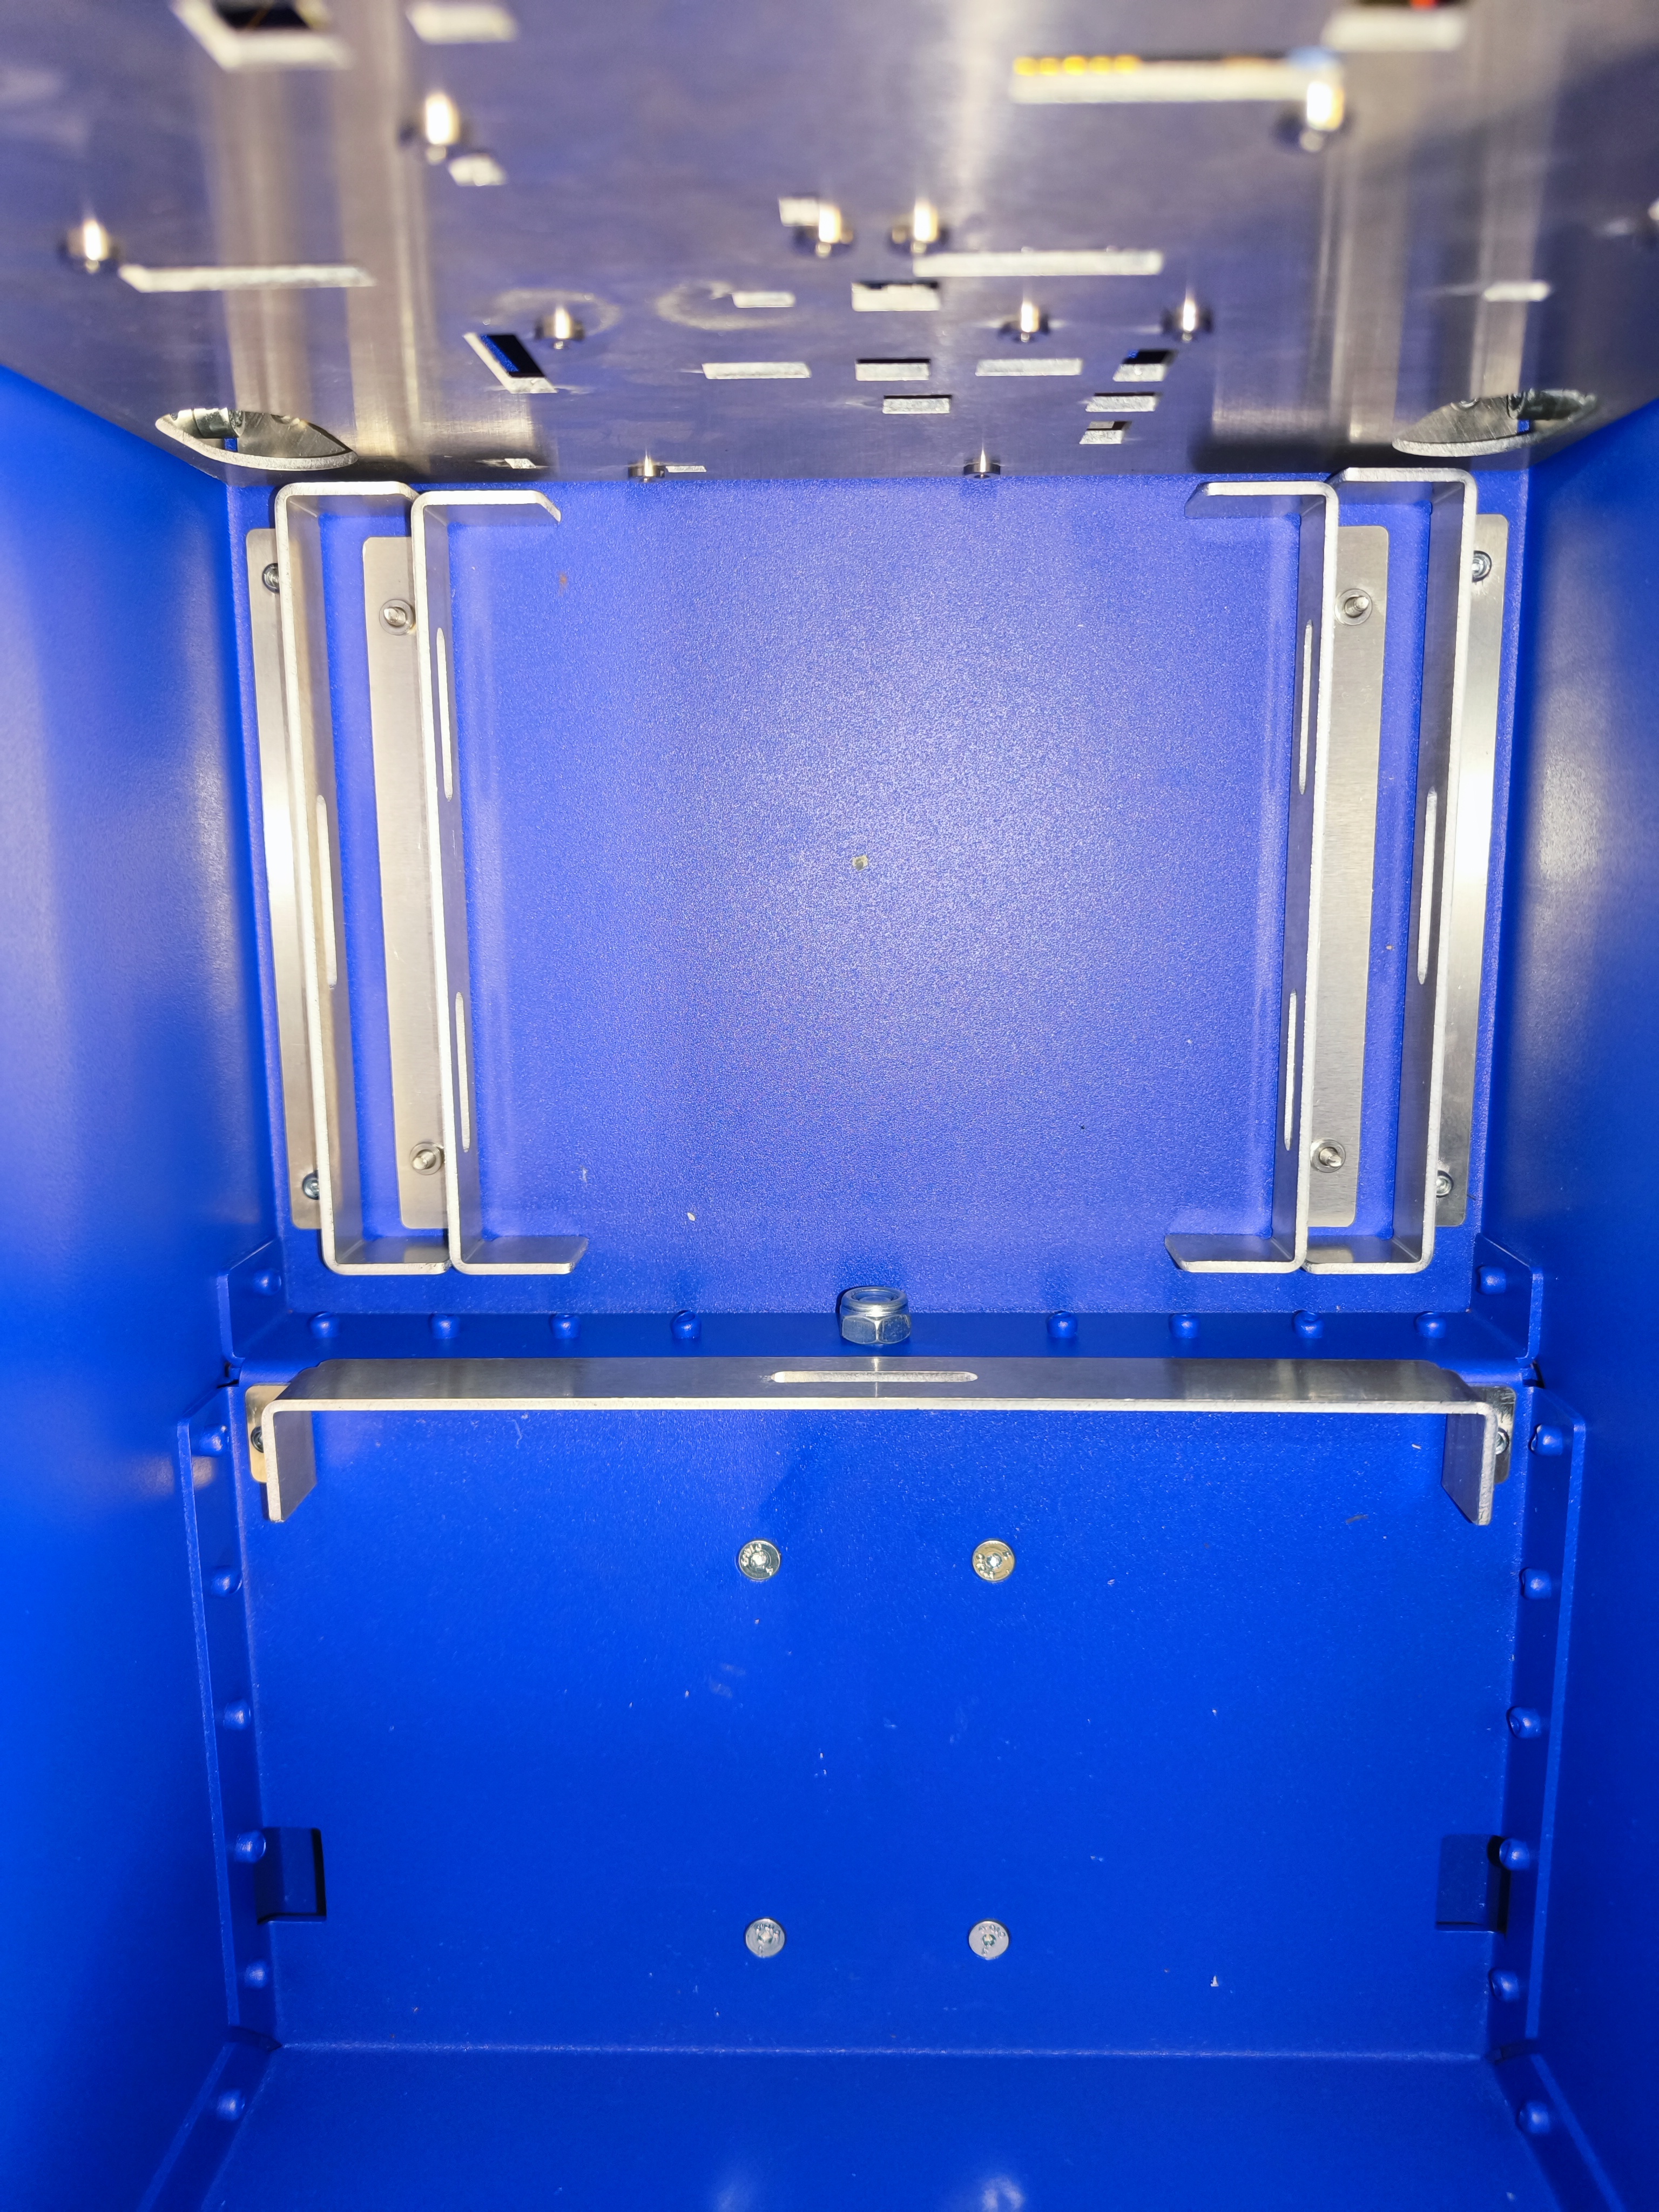
Preparing the Battery Bay
Before installing the batteries, ensure the brackets are correctly positioned in the battery bay.
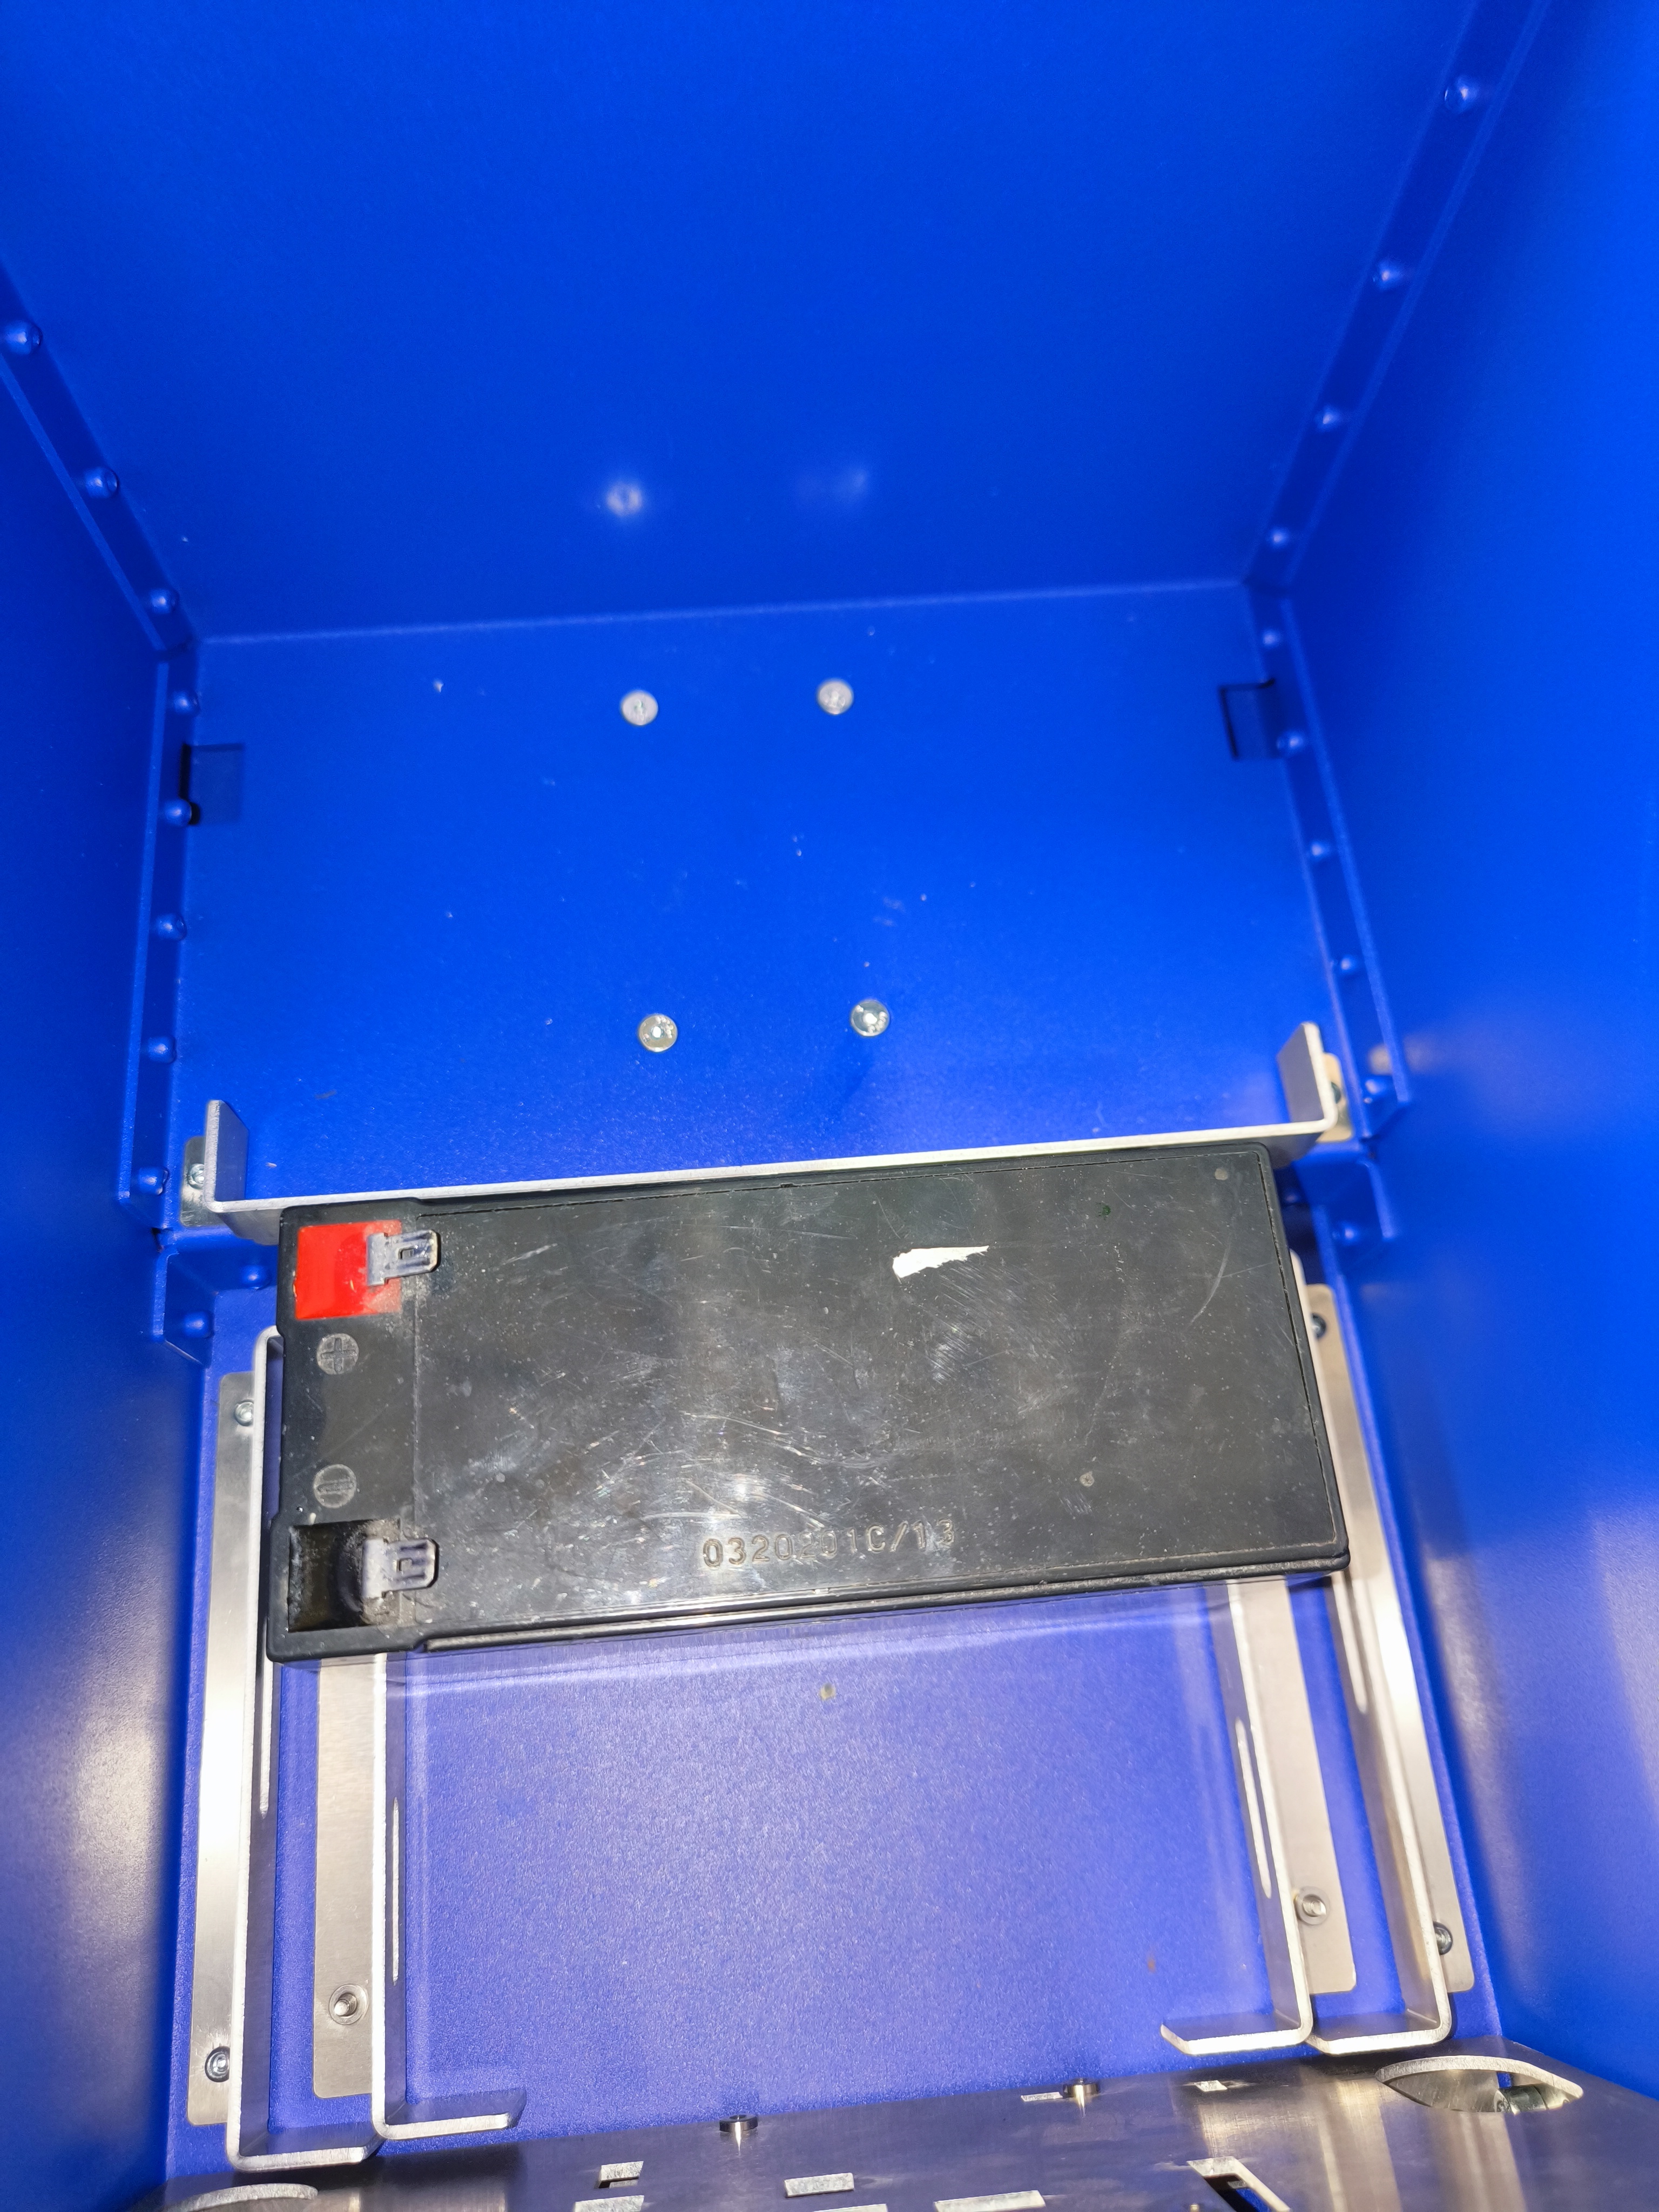
Installing the First Battery
Place the first battery into the bay as shown below.
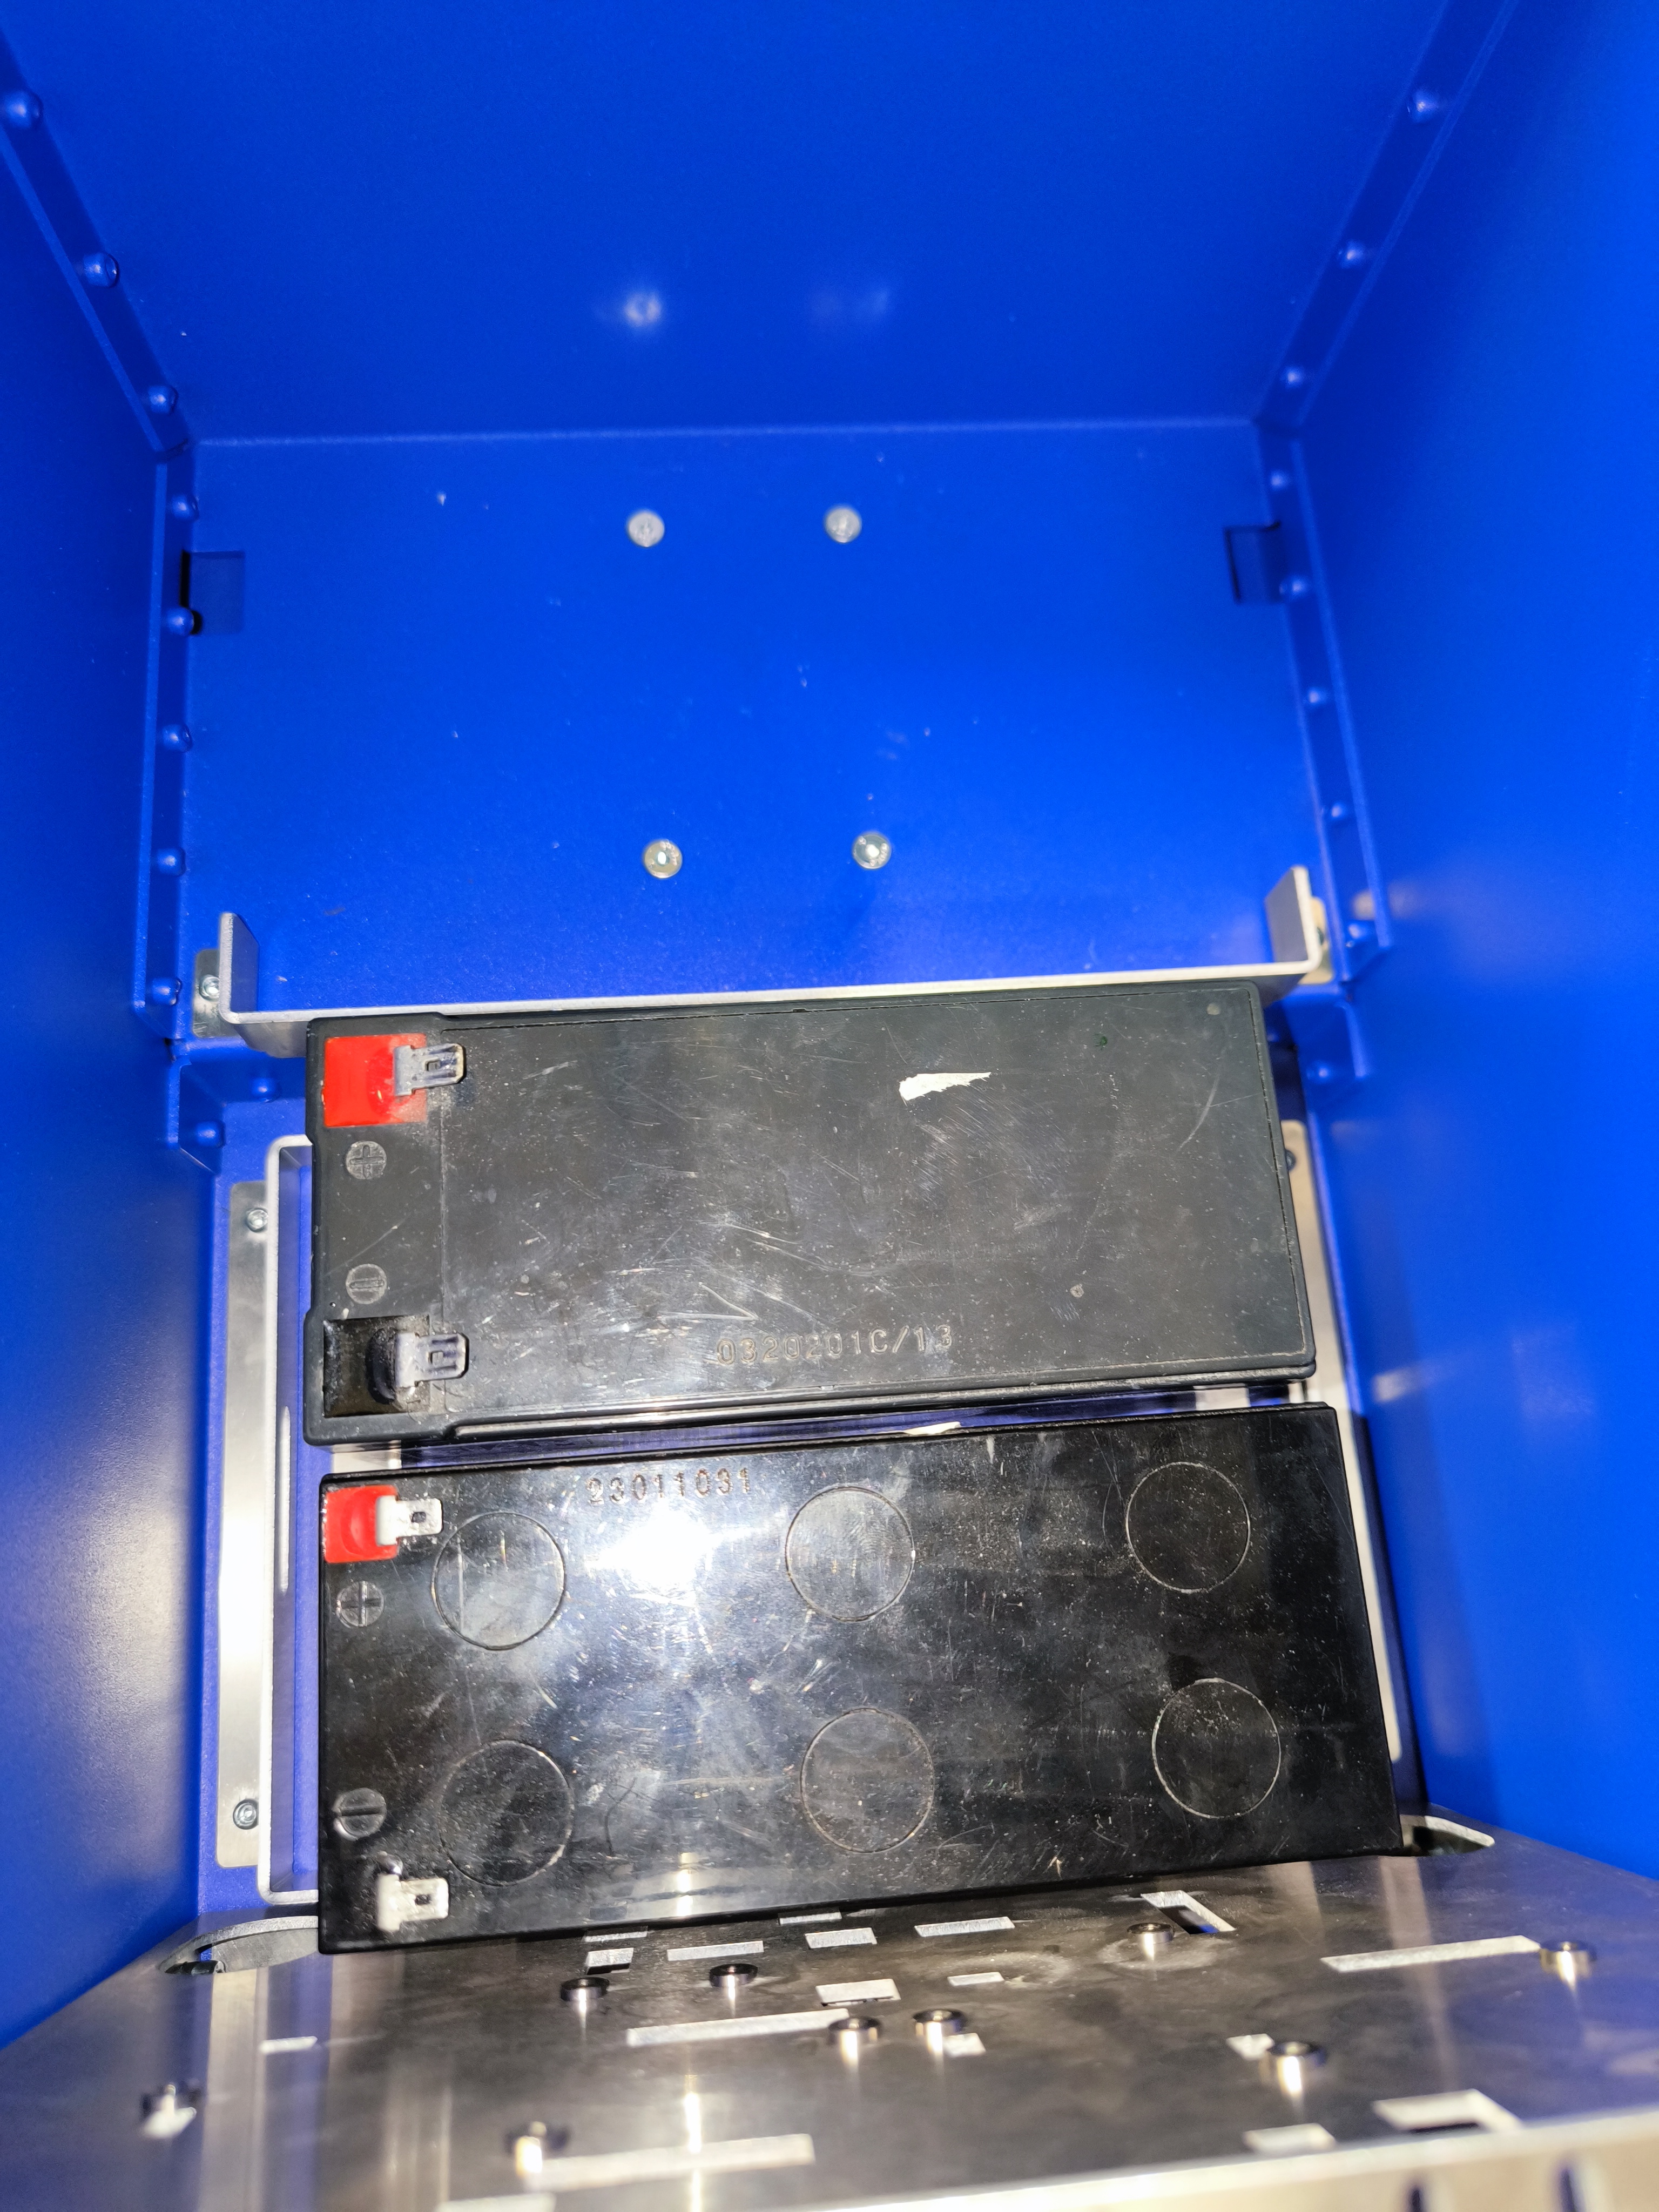
Installing the Second Battery
Add the second battery alongside the first.
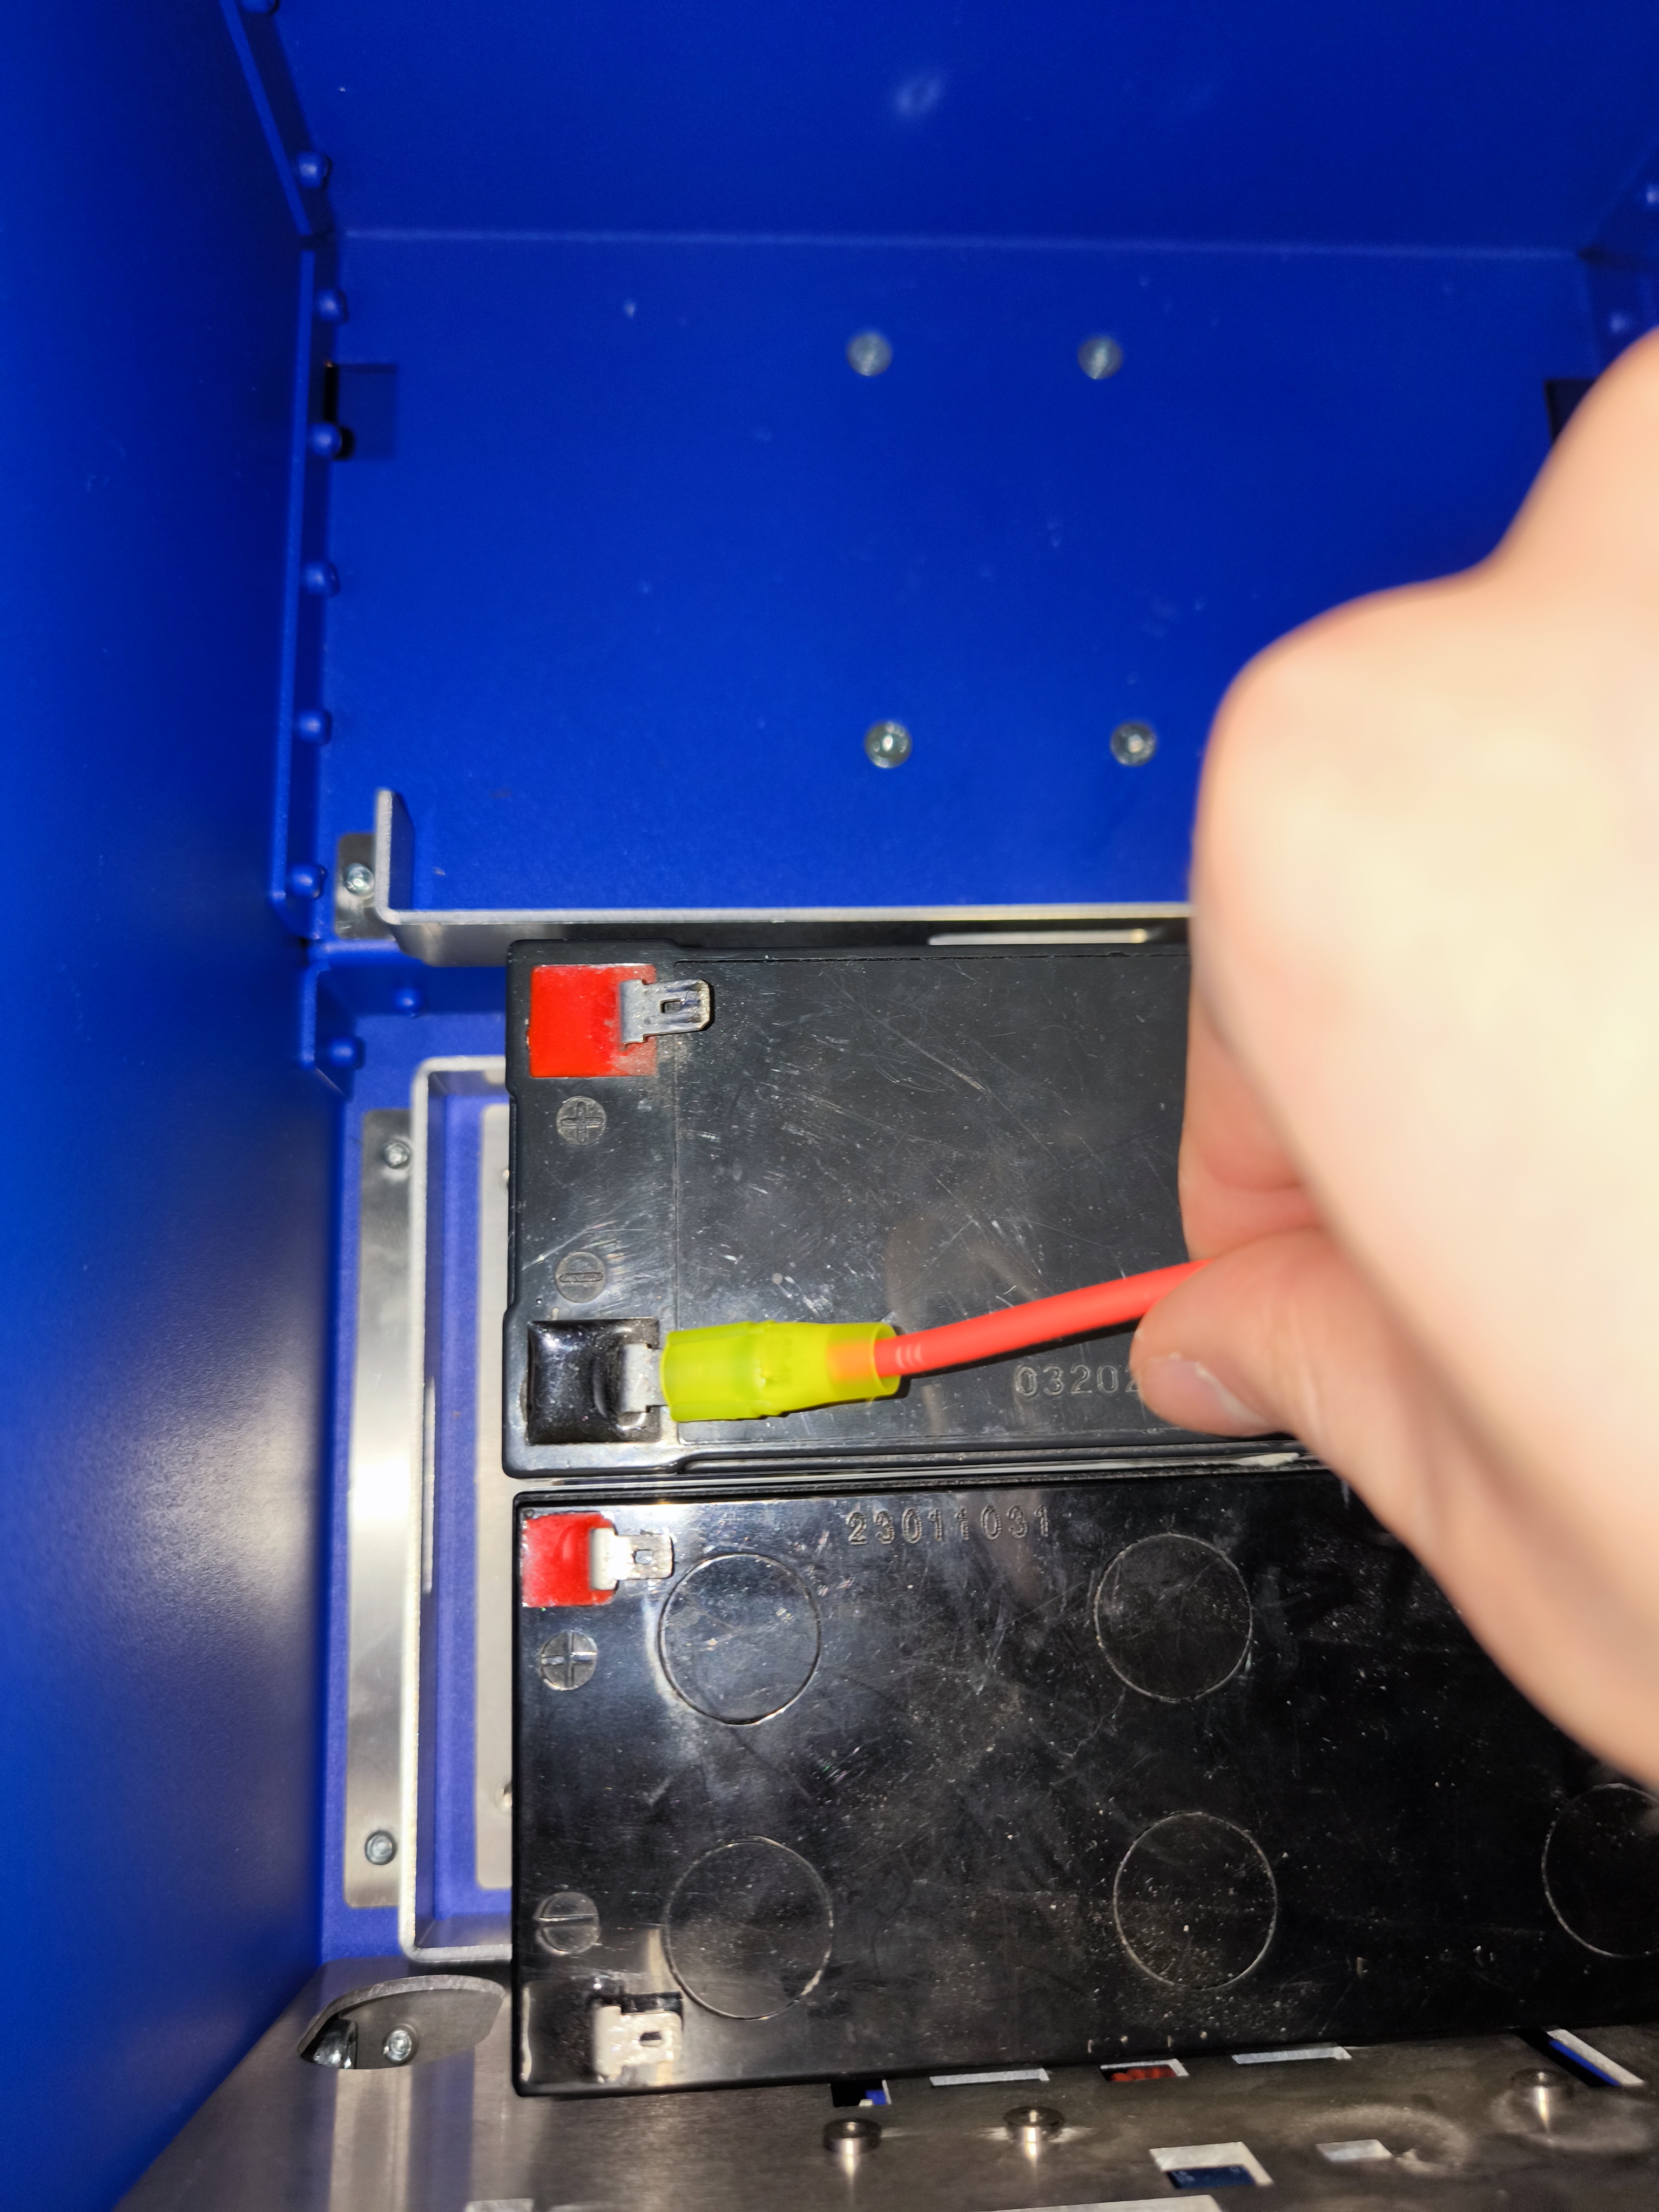
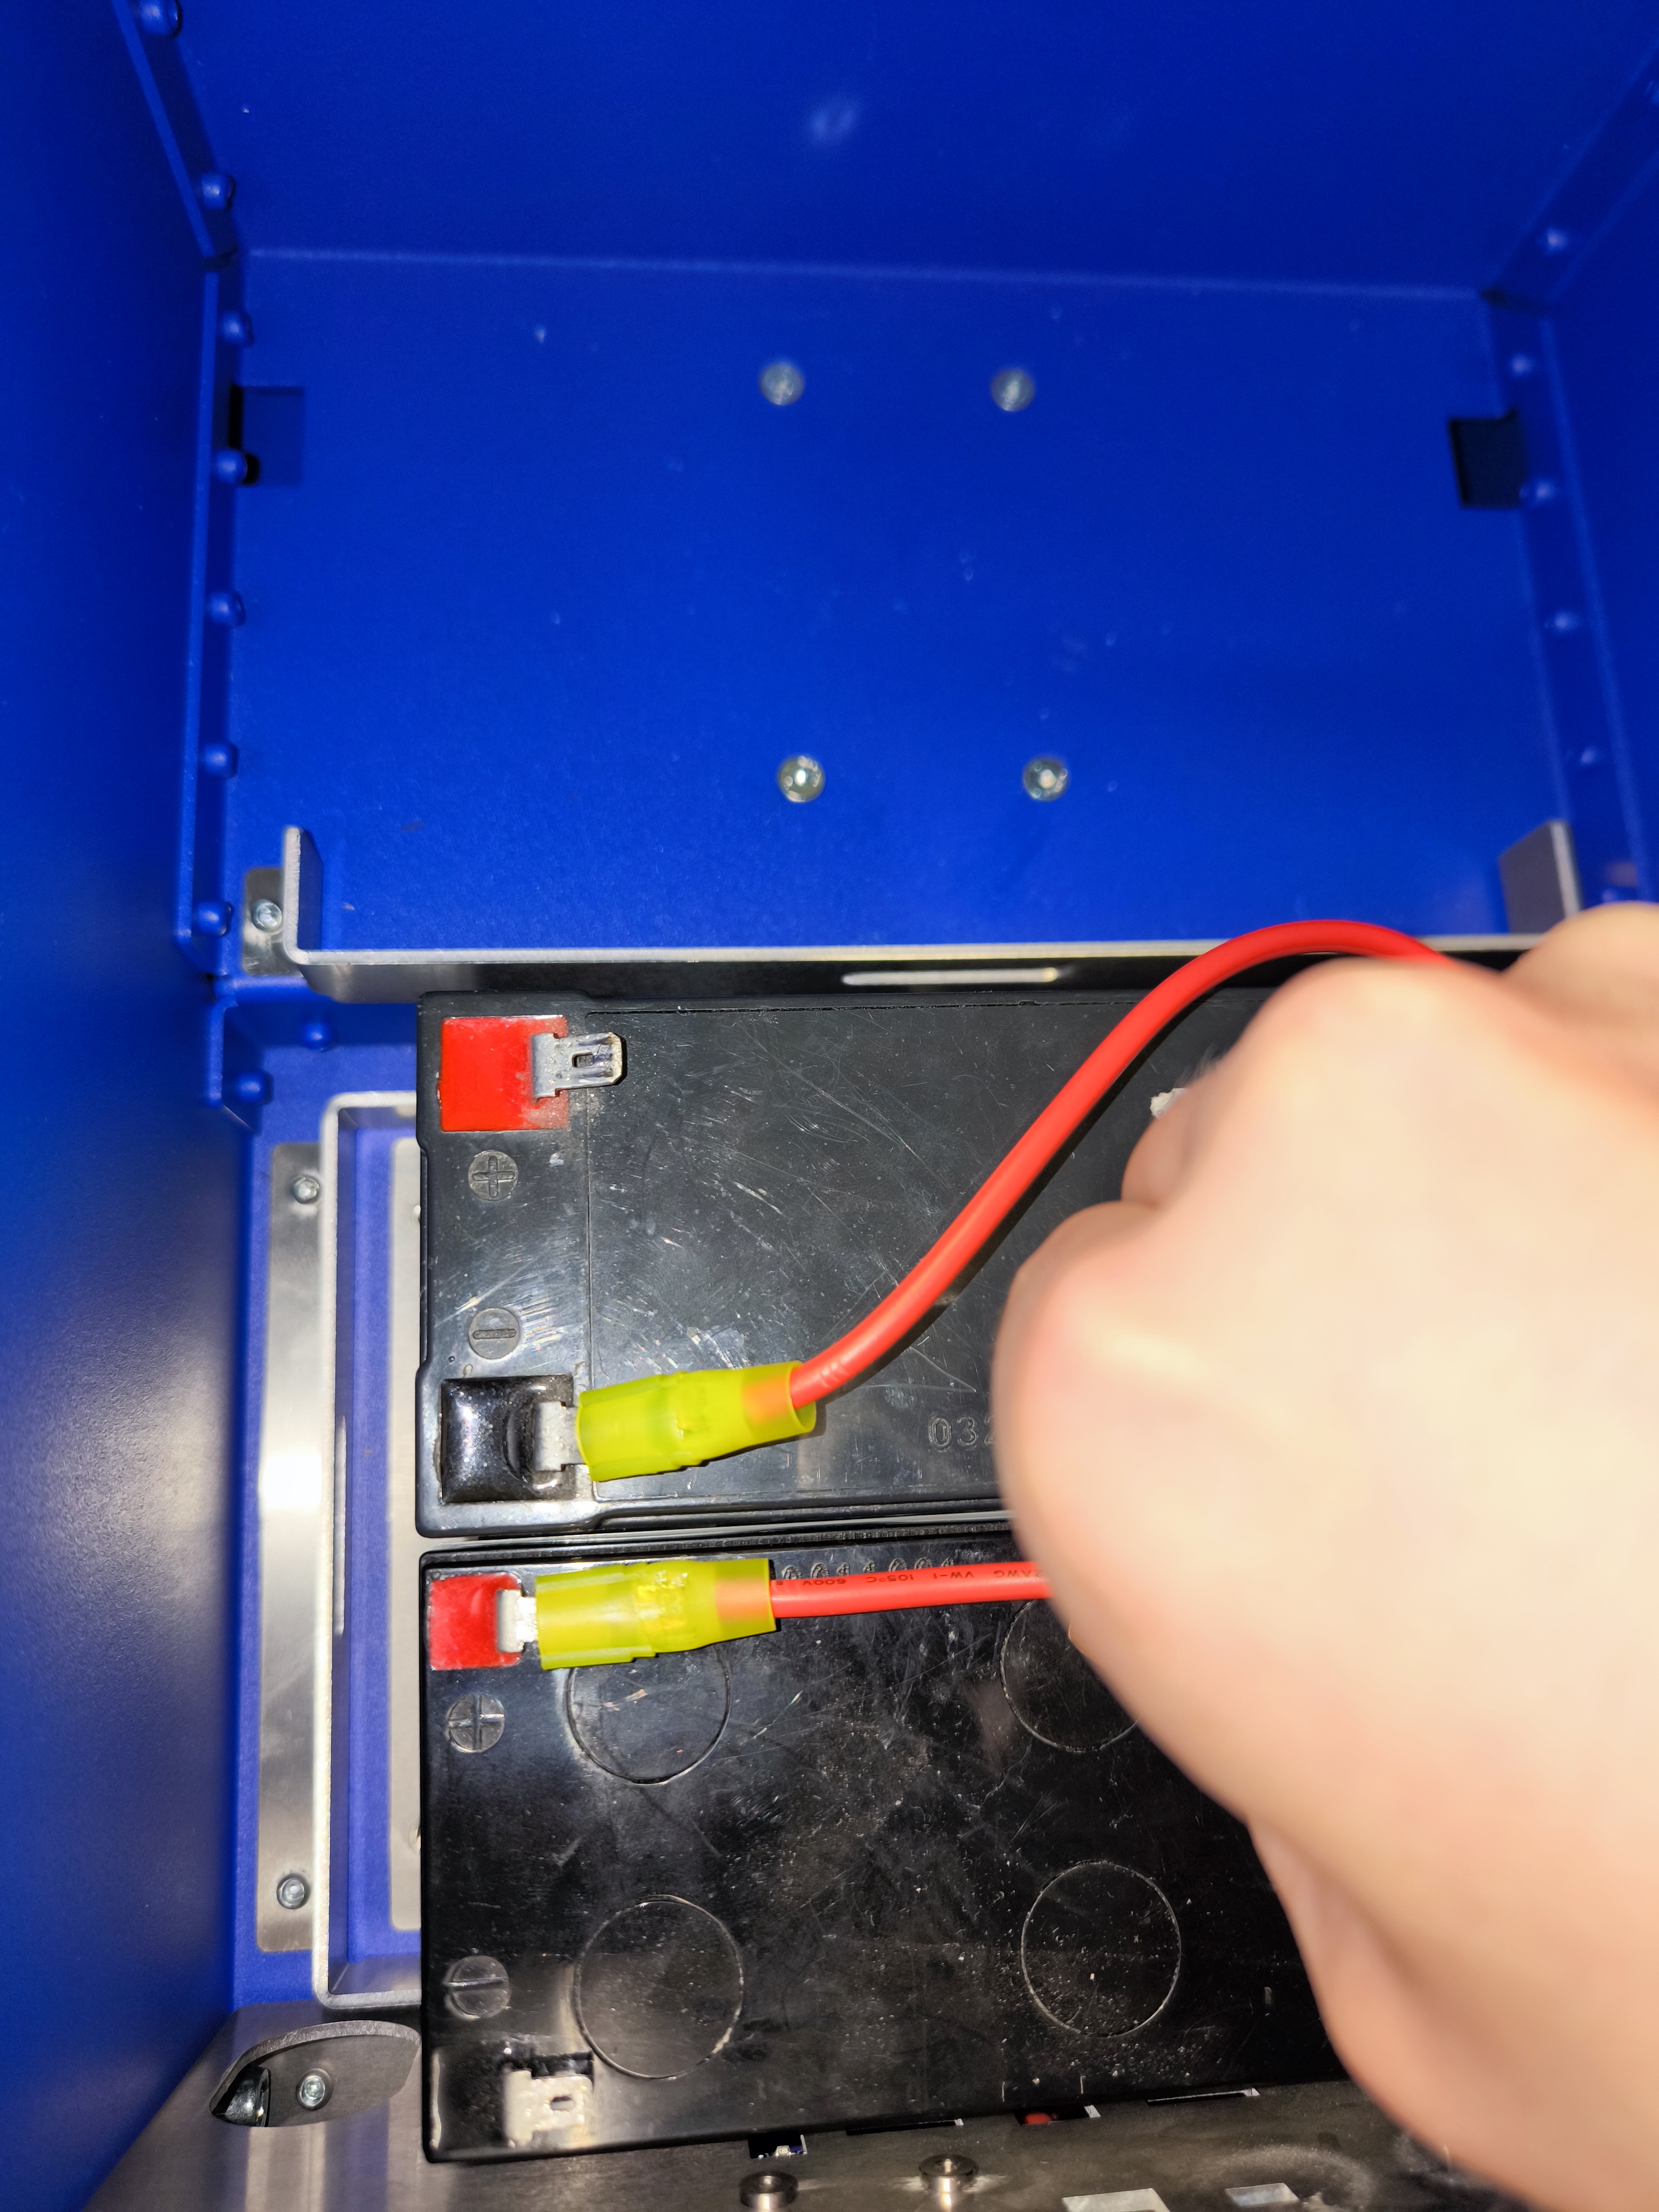
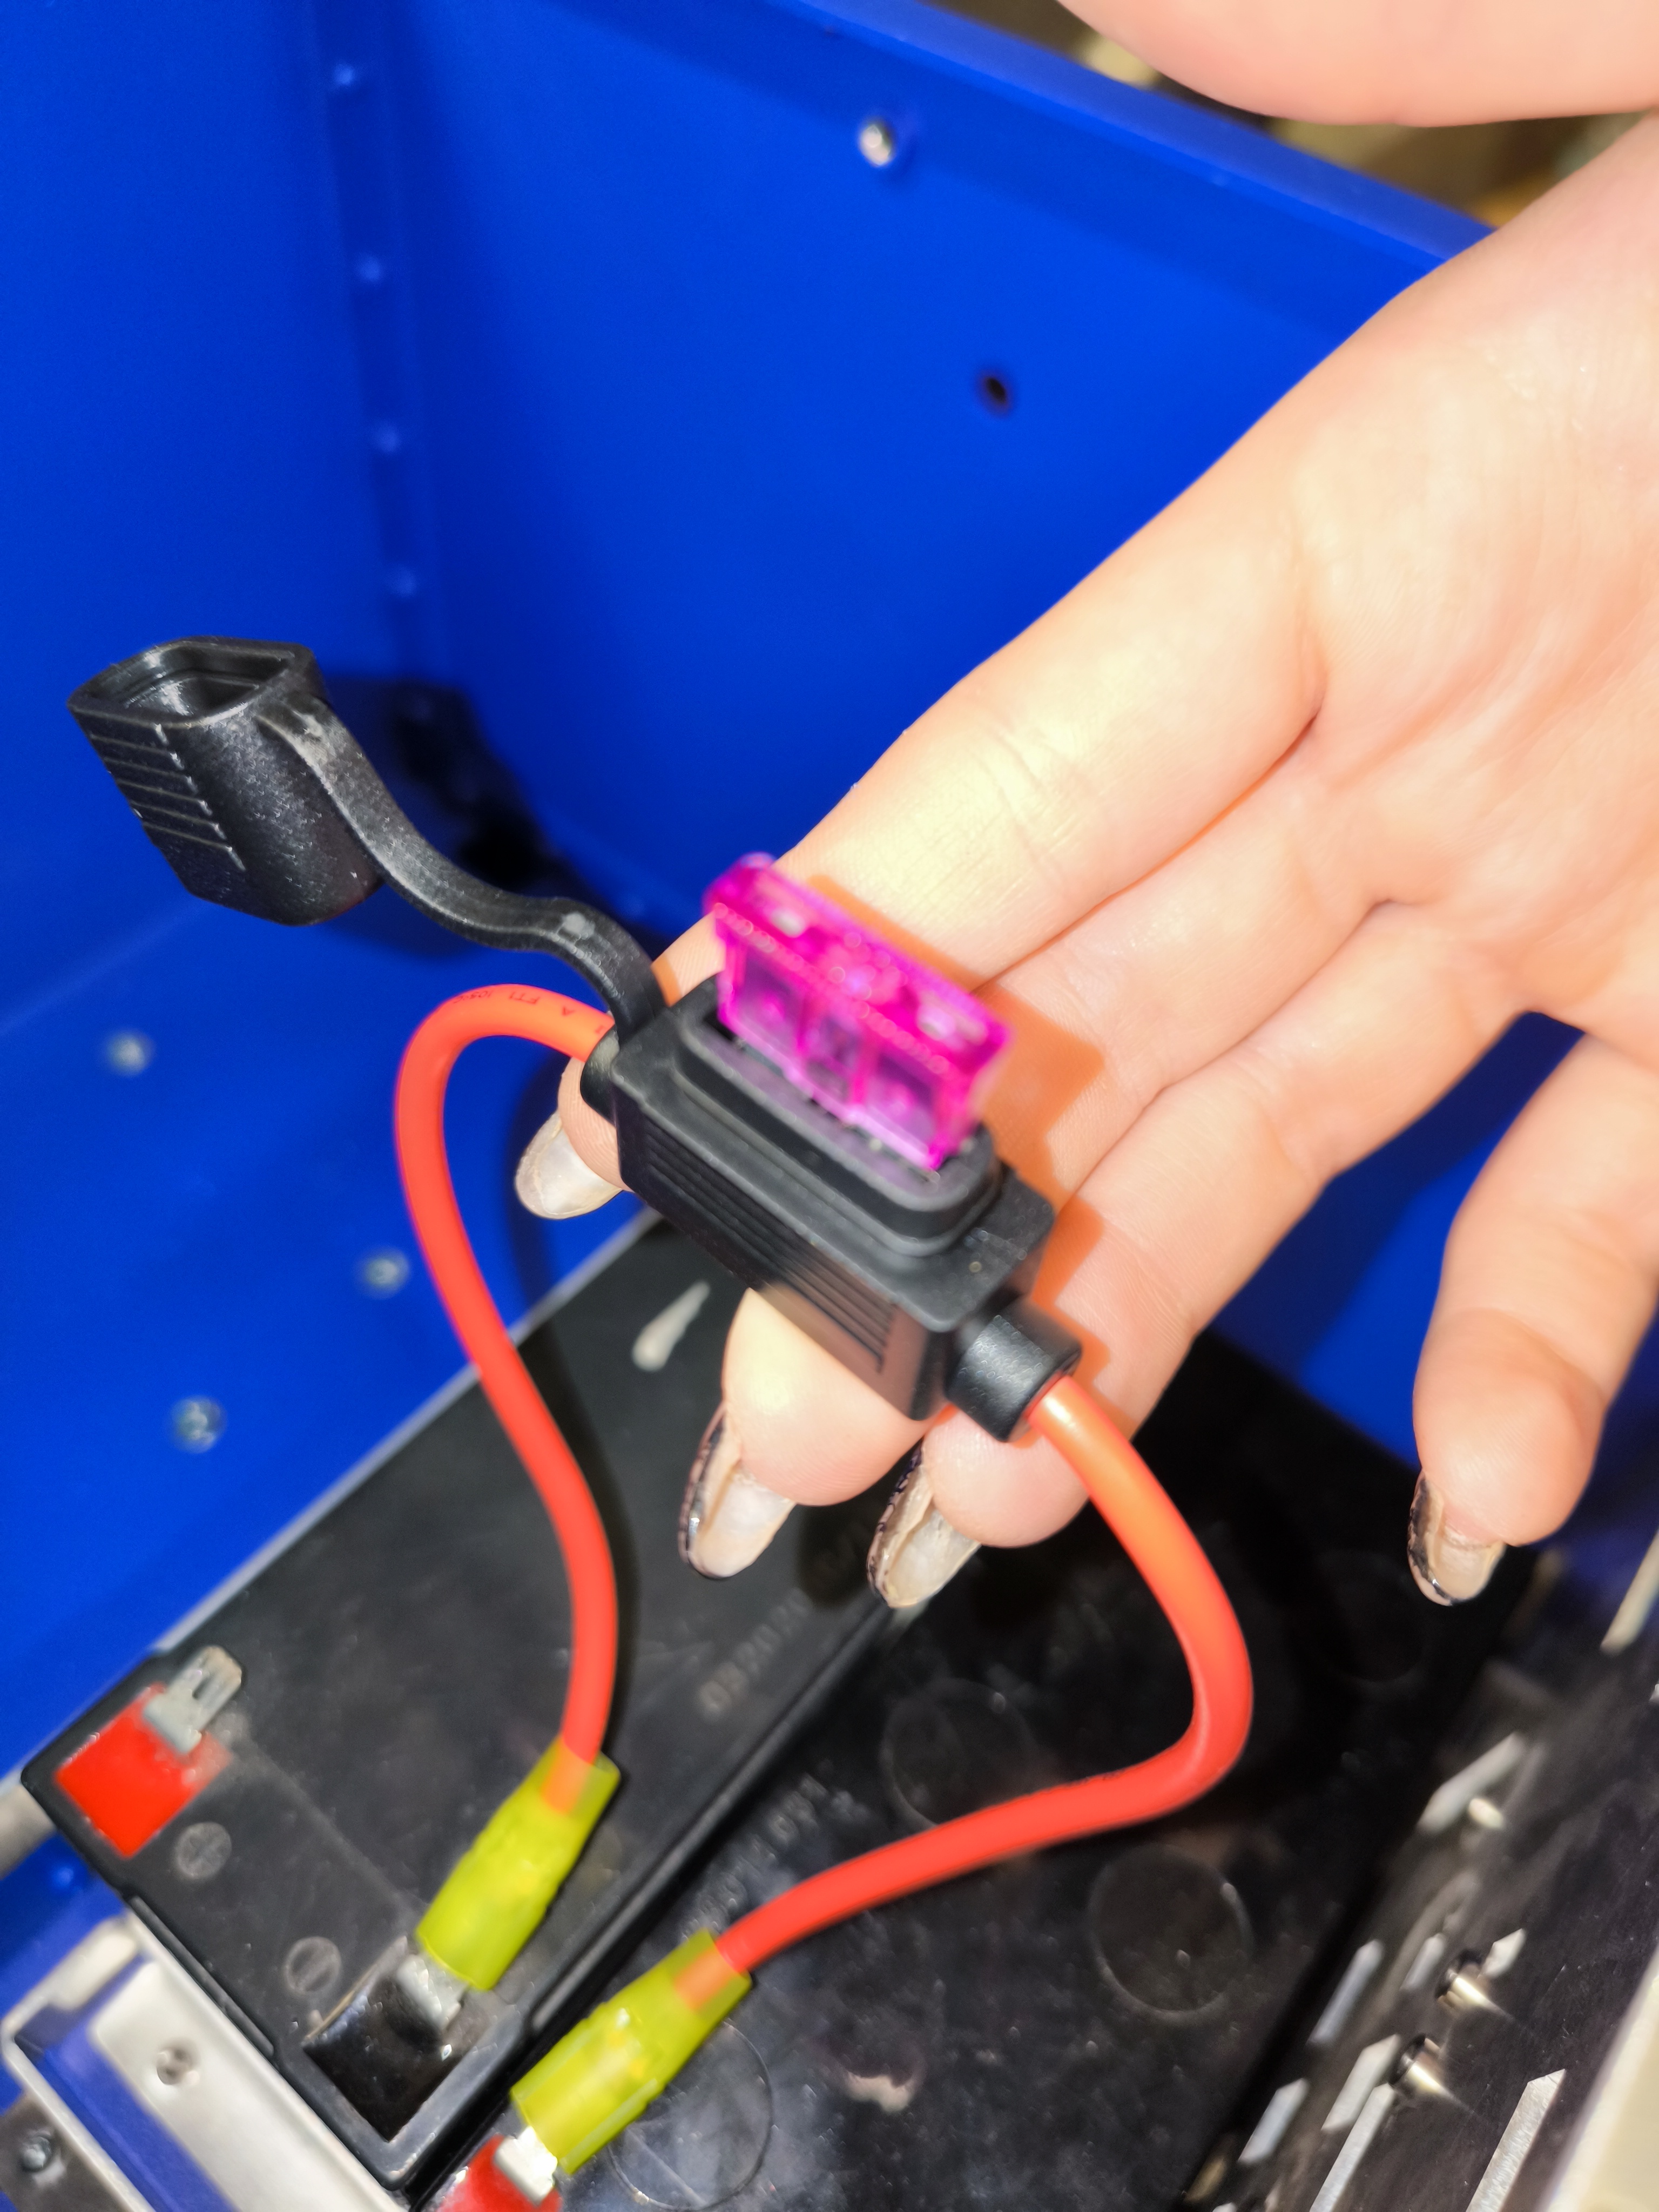
Wiring and Connections
Warning
CRITICAL BATTERY SAFETY:
Red Terminals: The wire harness terminals with red end termination MUST be connected only to the battery terminal that is RED and currently free.
Black Terminals: The wire harness terminals with black end termination MUST be connected only to the battery terminal that is BLACK and currently free.
Failure to match these correctly will cause a short circuit and potentially damage the electronics.
Series Connection (24V)
The batteries must be connected in series to provide the required 24V power. Use the provided diagrams for reference.
Important
Ensure the batteries are connected in series (Positive of one battery to Negative of the other) as shown in the diagrams below to achieve 24V. Do NOT connect them in parallel.
Final Check
Before powering on, verify all connections and ensure the robot is on a flat surface.
Next Steps
Once unboxed and powered, proceed to Connecting to the Robot to start using your robot.